Using Conditional Logic to Control Custom Checkout Fields in WooCommerce
The checkout page is honestly one of the most important pages on any WooCommerce store and yet it is also one of the most commonly left untouched after the initial setup. Most store owners go with the default fields, maybe add one or two custom ones and call it a day.
That works fine for simple stores but the moment your product range gets a little more varied or your customer base starts to diversify, a one-size-fits-all checkout page starts creating friction that you do not always notice right away but your customers definitely do.
This is where conditional logic comes in and it is genuinely one of the more powerful things you can do to your checkout without touching a single line of code. Instead of showing every field to every customer regardless of what they are buying or who they are, you get to control exactly what appears and when.
The right field shows up at the right moment and everything else stays out of the way. That kind of dynamic checkout experience is what a good checkout field editor for WooCommerce makes possible and this blog is going to walk you through exactly how it works.
What Conditional Logic Actually Does on the Checkout Page
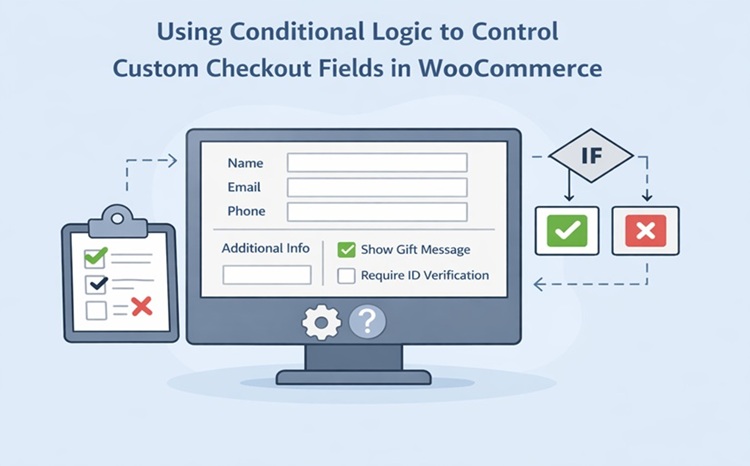
Before getting into the setup, it is worth understanding what conditional logic means in this context because it is a term that gets thrown around a lot. At its core, it is just a set of rules that determine whether a field should be visible or hidden based on something else, whether that is another field the customer filled in, the product they are buying, the category that the product belongs to, or even the user role of the person checking out.
So for example, if you sell both physical and digital products, you might have a delivery instructions field that only makes sense for physical orders. With conditional logic, you can set that field to only appear when a physical product is in the cart and hide it completely for digital purchases. Or if you offer gift wrapping as an add-on you can show a gift message text area only when the customer checks the gift wrapping checkbox, keeping the checkout clean for everyone else.
These are small things individually but together they make the checkout feel like it was built specifically for each customer’s situation and that kind of experience reduces hesitation at the final step.
Setting Up the Checkout Field Editor for WooCommerce
The plugin we are working with here is the Conditional Checkout Fields plugin by FmeAddons and getting it configured is straightforward. Once it is installed and activated, head to WooCommerce > Settings > Conditional Checkout Fields for WooCommerce and this is where everything lives.
The fields are organized into three main sections:
- Billing, which covers the billing address and payment portion of checkout
- Shipping, which handles the shipping details section
- Additional, which is the additional information section that appears after billing and shipping next to the order notes
Each section works the same way so once you are comfortable in one, the others are just as easy to manage. You can view all existing default and custom fields in each section and edit, reorder or hide any of them. Reordering is done with a simple drag and drop interface which makes rearranging the checkout layout something you can do in seconds.
To add a new field, click the Add Field button inside whichever section you want the field to appear in. You will then be able to configure everything about that field including the type, label, placeholder, whether it is required, its position and of course the conditional logic rules.
Choosing the Right Field Type for Your Needs
The WooCommerce checkout field editor gives you 15 different field types to work with and picking the right one matters because it directly affects how easy it is for the customer to fill in. Here is a quick breakdown of the most commonly used ones and when they make sense:
- Text Field: For short single-line inputs like a reference number or a custom name
- Text Area: When you need the customer to write something longer like special delivery instructions or a personalized message
- File Upload: Useful if customers need to attach something relevant to their order like a design file or a prescription
- Dropdown: Good for giving customers a set list of options to pick from without taking up too much space
- Radio Button: Similar to dropdown but displays all options at once which works well when there are only two or three choices
- Checkbox and Simple Checkbox: The regular checkbox works for multi-select options while the simple checkbox is basically a yes or no toggle
- Date Picker and Time Picker: Ideal for delivery scheduling, appointment-based products or any order that needs a specific date or time attached to it
- Color Picker: A great addition for stores that sell customizable products where the customer needs to select a color
- Paragraph and Heading: These are display-only fields, meaning they do not collect input but let you add instructions or visual section breaks inside the checkout form which is genuinely useful for longer checkouts
Applying Conditional Logic to Your Custom Fields
This is the part that ties everything together and it is simpler to set up than it might sound. When you are editing or creating a field inside the checkout field editor for WooCommerce you will see an Add Conditions option at the bottom of the field settings. This is where you define the rules that control when that field appears.
The logic works on two levels:
- Within a condition group, the relationship is AND meaning every condition in that group must be true for the field to show
- Between multiple condition groups, the relationship is OR meaning if any one group’s conditions are all met the field will appear
So in practice if you want a field to show only when a customer is buying from a specific category AND has selected a particular shipping method you would put both of those conditions inside the same group. If you want the field to show for either of two different scenarios you would create two separate groups each with its own conditions.
Beyond field-to-field dependencies you can also control visibility based on:
- Specific products or categories in the cart: Show or hide a field depending on what the customer is purchasing, which is particularly useful when your store carries products with very different information requirements
- User roles: Show certain fields only to wholesale customers, hide fields from guests that are only relevant to registered users or display admin-only fields when you are placing a manual order. The plugin lets you select one or more user roles and define whether those roles should see or not see each field
All of these conditions can be combined which means you can get quite specific about exactly who sees what and under what circumstances without any of it feeling complicated to manage from the backend.
Adding Pricing to Conditional Fields
One thing worth mentioning that often gets overlooked is that you can assign a price to any custom checkout field using this WooCommerce checkout field editor. This turns conditional fields into a quiet but effective upselling mechanism. When a customer selects a paid add-on option like gift wrapping, priority handling or express processing, the extra charge gets added automatically based on the field interaction.
You can also use the repeat field feature here which repeats a field based on either the number of items in the cart or a specific product quantity. So if a customer has five items and you want to collect personalization details for each one the field appears five times, once per item, and you can apply per-instance pricing on top of that as well.
Adding New Sections to the Checkout Page
Sometimes the existing Billing, Shipping and Additional sections are not enough and you need a completely separate block on the checkout page for a specific set of fields. The plugin lets you add custom sections and place them at very specific positions including before or after customer details, billing fields, shipping fields, registration fields, and order notes.
When creating a new section you set a title, a section name and choose the display position. From there the same visibility controls apply, you can show or hide the entire section based on products, categories and user roles and you can apply conditional logic at the section level as well.
So an entire block of fields can appear or disappear based on what is in the cart which keeps the checkout from ever feeling cluttered regardless of how many fields you have set up behind the scenes.
Where Custom Field Data Shows Up After Checkout
Setting up the fields is only part of the picture because you also need that data to actually be visible where it matters. Each custom field has simple checkbox options that let you control whether it appears on the order details page, the customer’s My Account page and in invoice emails.
This means the information a customer fills in during checkout does not just disappear into the backend but shows up in the right places for both the customer and your team to reference after the order is placed.
Conclusion
A well-configured checkout field editor for WooCommerce does a lot more than just add a few extra input boxes to your checkout page. When you combine custom fields with conditional logic, user role targeting and product-specific visibility rules you end up with a checkout that feels genuinely tailored to each customer’s situation rather than a generic form everyone has to wade through.
The Conditional Checkout Fields plugin by FmeAddons gives you all of that without requiring any development work and once you start using it properly you will find it hard to go back to a static checkout setup.