How Do You Choose The Right Components For Building A Computer?
The only reliable method to ensure your gaming PC meets your specific tastes is to build it from scratch. You can be sure you’ll be able to play the games you want at the frame rates you desire when you choose every PC component, starting with the power supply. Furthermore, if technology advances, your demands and preferences for gaming also change, and a custom built PC leaves room for future improvements.
Here’s how to select PC parts.
What Do You Want To Build?
You may be a student conducting research and editing, an avid gamer searching for a good gaming PC, or someone who uses their computer for daily work. You won’t have to spend money on unnecessary items if you know what type of PC you want and what kind of hardware and performance you want.
What Can You Afford?
As you start the custom pc-building process, here are a few things to consider:
- Budget: It is highly recommended to set a budget before selecting any components. Later on, you can update specific parts.
- Compatibility: Create a list of required parts, as every component works with another component specifically before making any purchases.
- System Requirements: Check the recommended system requirements of the game you want to play if you’re constructing this PC, and make your plans accordingly.
Tools For Custom PC Building
Before starting this process, you must get the necessary equipment. Having your workstation and resources ready in advance can guarantee a successful procedure.
- Workspace: You’ll need a large surface, such as a table, to work on this. Ensure you stand on an uncarpeted area to avoid an unintentional electrostatic discharge, which can harm delicate components.
- Screwdrivers: A Phillips #2 screwdriver is required for almost all tasks. A Phillips #0 screwdriver is also required when installing an M.2 device. You can use magnetic screwdrivers to keep screws from falling inside the case; they shouldn’t harm any parts.
- USB Flash Drive: You’ll need a flash drive with at least 8GB of space to store the operating system installer.
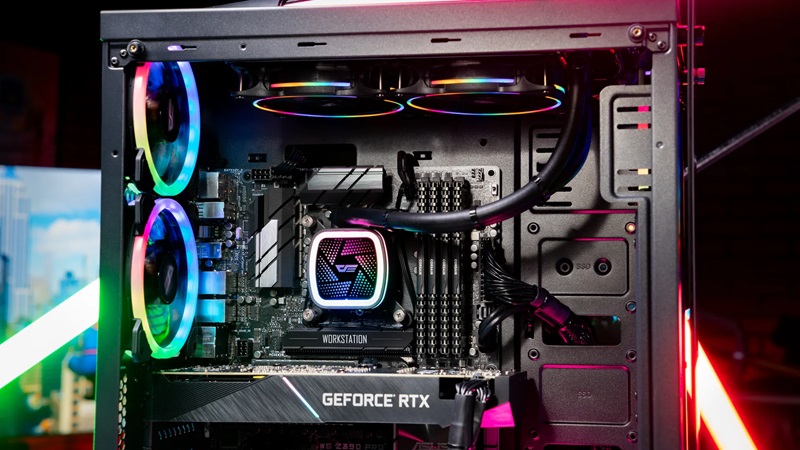
What Hardware Parts Will You Need?
For any PC construction, you should look for the following five hardware parts:
- Motherboard
- Processor/Central Processing Unit (CPU)
- Memory (RAM)
- Storage (SSD)
- Case, fans and power supply
Operating system (OS), monitor, mouse, power supply, keyboard, and other parts won’t affect performance as much, but don’t forget to add them to your total budget.
-
Motherboard
The motherboard is the first component you should select because it is the circuit board that links all of your hardware, power supply, and graphics cards. The motherboard also adds compatibility to the computer with additional devices. A thing to keep in mind is that not every component works with every motherboard.
-
Processor/Central Processing Unit (CPU)
Your computer’s CPU is its engine. The CPU powers your computer’s activities by providing the processing power and instructions.
Consider gigahertz (GHz) while choosing a CPU to install; the higher the GHz, the quicker the processor. More GHz, however, means the CPU uses more energy, raising the system’s temperature and needing more ventilation or heat dissipation. You’ll also need to include a cooling system in your construction.
-
Memory (RAM)
One of the quickest and least expensive methods to improve a computer’s speed is to add memory (RAM). RAM allows your computer to temporarily store more data in use, making it easier for you to multitask and browse the web quickly. Examples of such tasks include keeping many apps open at once. Compatibility and the maximum amount of RAM your system can handle are the two factors to consider while selecting the optimum RAM.
-
Storage SSD
A storage drive, such as a solid-state drive (SSD) or hard disk drive (HDD), is where you can place your files and data. HDDs are no longer necessary, although they were more expensive and supplied more capacity than SSDs in the past. SSDs are 90x more energy-efficient and run 6x quicker on average than HDDs.
-
Case, Fans, and Power Supply
The case, fan, and power supply you’ll need to utilize will also depend on the type of custom PC you’re building. You’ll need a strong power supply to fuel your PC’s performance. Additionally, you’ll need a casing with fans to remove hot air that might harm the system and ideal interior ventilation. The best advice is to use zip ties to organize all the cords within your equipment. Moreover, merging connections provides better ventilation.
Assembly
Now, it is time to learn how you can build your custom pc.
STEP 1: Install CPU
You should place the motherboard on your work surface after it is removed from its antistatic case. Find the CPU socket; it will have a plastic covering protecting it. You should note the location of the little arrow in one corner of the plastic cap or, more frequently, on the socket itself.
There’s a little metal lever next to the CPU socket. To open the socket tray, depress the lever and gently move it away from the socket to the side.
Take the CPU out of its container by opening it. The CPU and the CPU socket are sensitive and can be damaged. Therefore, handle them with care. Keep your fingers away from the pins on the bottom of the CPU to prevent dust or oil from leaving prints, and avoid touching the top of the chip. Instead, hold the CPU by its edges.
Within the CPU, there’s an arrow located in one corner. Gently insert the CPU into the socket by aligning this arrow with the socket’s arrow. You can gently place the CPU and then push it back into position by lowering the retention lever.
STEP 2: (Optional) Install M.2 SSDs
First, locate the motherboard’s M.2 slot. There’s a little screw across from this tiny, horizontal groove. Read the user manual that comes with your motherboard if you are having trouble finding it, see several M.2 slots, or want to install more than one M.2 SSD.
Using a Phillips #0 screwdriver, extract the little screw. Don’t lose it.
Gently insert the M.2 SSD into the slot. When fully seated, it will emerge from the motherboard at a roughly 35-degree angle. To secure the SSD in place, press it down and put the little screw back in.
STEP 3: Install CPU Cooling
Different kinds of CPU coolers exist. We advise you to read the manual with your CPU cooler for precise installation instructions.
Mounting brackets are needed for some coolers. There could be a bracket already attached to the motherboard; if your cooler doesn’t require one, you might need to remove or replace it with a new one before inserting the motherboard into the casing.
On the conductive substance that is on the CPU, some coolers have thermal paste already applied, while other coolers do not. You must manually apply the thermal paste before you seat the cooler if it does not come with it already applied. Squeeze a tiny dot onto the CPU’s centre to apply thermal paste. Next, set the cooler on top of the CPU; the pressure from this will evenly distribute the thermal paste.
STEP 4: Install Memory (RAM)
Check the number of RAM slots on your motherboard; most have two or four. You may just snap the RAM into place if you plan to use every RAM slot that is accessible. If you intend not to use all of the RAM slots, read the user handbook to determine the appropriate setup and then fill the RAM slots as necessary.
STEP 5: (Optional) Test Run Outside the Case
Performing and troubleshooting this test becomes more challenging when everything is mounted in the case. Installing the GPU and connecting everything to the power source is how to accomplish this. Plug the power supply in and turn it on after making sure the motherboard, GPU, and CPU are all connected to the power supply.
Power buttons are on certain higher-end motherboards but not on many. Look for the power switch pins, which are tiny pairs of prongs that emerge from bright nodules.
At this point, you should be able to determine which of your parts are broken or not working properly. Ensure there is no remaining power in the system, turn off the power supply when the test run is complete and watch for any motherboard LEDs to go black. Next, remove the GPU from the system and disconnect all power cords before moving on to the following step.
STEP 6: Mount the Power Supply
If the PSU is a complete or semi-modular unit, remove its cords and unpack it. If you choose to try it out, disconnect it from the components.
Examine your case and determine the intended location of the PSU and its orientation. You should place PSUs ideally so that their fans face outside the case. If your case includes a bottom vent, you can install the PSU upside down, provided that the vent will have sufficient airflow when the PC is done.
It’s time to pass the associated wires through the case to their final destination if you’re using a non-modular or semi-modular power supply.
STEP 7: Install Motherboard
If your motherboard includes an unattached I/O shield, a rectangular metal sheet with ports cut out, you should first place it into the back of your case, ensuring it is orientated correctly. I/O shields frequently have sharp edges, so protect your fingers.
Installing the motherboard is possible after the I/O shield is in position. Make sure all of your wires are inserted into their designated holes, then position the motherboard by first aligning it with the I/O shield. Install the centre screw to secure the motherboard using a Phillips #2 screwdriver.
Depending on the motherboard, you may need more or less screws to attach it, but a full-size ATX motherboard typically requires nine. Completely fill in any available screw holes. Attach the motherboard to the power supply. There are two primary connections: a 24-pin connector on the side and an 8-pin CPU connector toward the top of the board.
STEP 8: Install GPU
Check the user manual to see which of the several PCIe x16 slots on your motherboard you should focus on. If you want your GPU to have some breathing area, choose a slot for it, depending on where other components are installed.
To make your GPU’s I/O accessible from the outside of the case, you might need to remove the I/O covers, which are tiny metal tabs that hinder the back panel of your case.
After taking the GPU out of its antistatic cover, gently insert it into the PCIe x16 slot, making sure it lines up with the slot and the back retaining bracket. You will hear a click.
After the GPU is firmly inserted, use one or two screws to fasten it to the case’s back. Attach your GPU to the power source if it needs auxiliary power connections.
STEP 9: Install Storage
First, check your case. In the case of drive bays, each case is slightly unique. Inside your case, there should be a stack of bays of varying sizes. They might only resemble metal brackets, or they can have tiny plastic switches that show if they are tool-free bays.
There are two common sizes of storage: 2.5-inch (for HDDs and SSDs) and 3.5-inch (for HDDs). Most 3.5-inch bays can accept 2.5-inch drives, but not vice versa. Larger bays, which are for larger devices like optical drives and are often found at the front of the case, close to the top, can also be seen in your case.
For tool-free bays, each bay will have its own plastic lever or switch. Open or unlock the lever or switch, and you should be able to pull out the tray. Place your drive in the tray—some 3.5-inch trays will be designed to accept 2.5-inch trays. If they are, you’ll need to screw the 2.5-inch drive to the 3.5-inch tray so it doesn’t move around. Back in the bay, slide the tray. It should fit into position. After all your drives are positioned, attach the power supply and motherboard to them (using a SATA cable.
STEP 10: Install Operating System
This is the perfect moment to prepare your operating system (OS) on a USB flash drive if you haven’t previously. Turn on your computer by plugging in the USB flash drive containing your operating system, a monitor, mouse, and keyboard.
Press a key to access the BIOS, or system setup, on the first screen you see. Use the key to access the BIOS. You should first confirm that all of your components are installed and recognized. Find the BIOS page that displays the system information for your PC and verify that the system is detecting all of the installed software.
Next, go to the BIOS until you locate the “Boot” page, which might also be referred to as “Boot Priority” or “Boot Order.” If you’re using an SSD as your boot drive, you should install the operating system on this drive; otherwise, change the boot order such that your USB flash drive is first and your desired disk is second.
Give your machine a restart. The OS installer will appear when your machine boots up using the USB.
Conclusion
Building a custom PC for gaming is an ongoing process. As gaming system requirements change, you should upgrade your setup with the newest hardware according to your needs. This process of designing a custom PC will help you in all the gaming adventures ahead. It’s also good to optimize the performance of your PC.
Still, if everything is too much for you, you can get help from professional custom PC builders like Computer Builders Anonymous to enjoy a stress-free gaming adventure.
FAQs
Is it cheaper to build your own PC?
The cost of assembling a PC is determined by the component features that you buy. Generally, the initial cost of manufacturing a PC will be higher. Long-term savings come with a decreased likelihood of component replacement and repair.
Is it hard to build a computer by yourself?
Building a computer is surprisingly simple. All you’ll need is basic knowledge of parts, a few simple tools, and the ability to follow some easy instructions.
How many components are needed to build a custom PC?
You should consider seven essential parts unless you have spare parts: a case, a motherboard, a power supply, a CPU, a graphics card (or two), some RAM, and storage. There are many options available for each of these.